The washing machine retains water in the air conditioner compartment
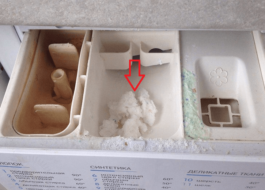
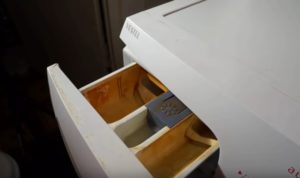 If after the next wash you notice that there is water left in the detergent tray, you should not put off diagnostics of the washing machine until later; you need to do the procedure as soon as possible. This kind of problem can appear in absolutely any device, regardless of the brand and model of the machine. Stagnant water in the air conditioner compartment indicates some malfunction in the system. Let's figure out why the liquid does not drain from the dispenser and what this may be due to.
What should I check?
You can diagnose the system yourself if you know what nuances to pay attention to first. There may be several reasons for the accumulation of liquid in the compartment.
- At what pressure does the water enter the system? It is possible that the pressure in the water supply system is very low, and therefore the water pressure will be weak. You can identify insufficient pressure by listening to the operation of the washing machine. If the machine takes an unusually long time to draw water and makes rustling sounds, this indicates either insufficient pressure in the water supply or incomplete opening of the inlet valve.
- Is the conditioner-rinse aid poured into the tray correctly? Perhaps in a hurry you mixed up the sections and simply poured the product into another compartment.
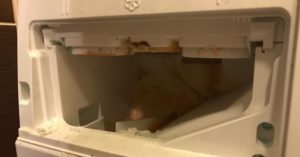
- Is there a blockage in the air conditioner flush channel? Rinse aid particles settle on the walls of the pipe, and the drain hole becomes smaller and smaller. Ultimately, this causes water to accumulate in the section.
- Is the dosage of the conditioner correct?Some users believe that if you add a lot of product, things will be even softer and more fragrant. In fact, the effect of such redundancy will be the opposite - the rinse aid will dry out, clog the channel and simply will not go into the system.
- Are you using a high-quality rinse aid? Too viscous, sticky conditioner can also cause a blockage in the drain hose.
All of the above factors can cause water to remain in the washing machine. By checking at what pressure the water is supplied to the system, whether the filling valve is functioning properly, whether the air conditioner drain hose is clogged, and whether too much rinse aid is poured into the dispenser, you can eliminate the cause of the problem.
Checking and cleaning the filter mesh
What should you do if you need to clean the inlet filter of your automatic washing machine? In fact, this procedure is very simple and does not require any preparation or special knowledge. If you follow the step-by-step guide below, you can clean it in 10 minutes. The algorithm of actions will be as follows:
- Turn off the power to the automatic machine, turn off the water supply tap to the washing machine;
- disconnect the inlet hose from the body. Please note that there is some water in the tube, so it is advisable to place a dry cloth on the floor;
- find the filter, use pliers to remove it from the opening of the filling valve;
- Clean the filter mesh well with water. For more thorough cleaning, you can soak the element in water with the addition of citric acid;
- After the mesh filter has dried, install it in its original place.
Further assembly of the washing machine occurs in the reverse order.It is necessary to screw the inlet hose to the body and open the shut-off valve, which is responsible for the free flow of water into the system. Inspect the place where the hose is attached to the machine, make sure there is no leakage there. Afterwards, you can turn on the washing machine and start the washing mode, so you can check that water is being drawn into the tank without any hindrance. Perhaps it was because of the contamination of the filter element that water remained in the conditioner compartment after washing.
If the filling valve is broken
In some cases, water does not drain from the detergent dispenser due to a faulty fill valve. You can replace the part and repair the washing machine yourself. First, find where the element you are looking for is located. In frontal washing machines, the filling valve is located at the top of the unit, in machines with a vertical loading type - at the bottom. The algorithm for replacing a part will be as follows: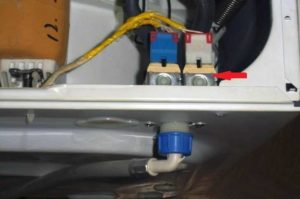
- disconnect the machine from the power supply, close the shut-off valve, disconnect the inlet hose from the valve;
- provide yourself with free access to the part; for this, the top cover of the case is removed for “front-facing” cameras, and the side wall for “vertical” cameras. To remove it, simply unscrew the bolts holding the walls;
- disconnect the supply wiring and all pipes from the fill valve;
- remove the valve from the body. The element can be screwed with self-tapping screws or secured with plastic latches. To remove the part you will have to unscrew the bolts or loosen the latches;
- turn the fill valve and remove it from the system.
In order to correctly connect all the wiring and hoses to the new part, it is better to photograph the initial connection diagram before disassembling, this will allow you not to make mistakes during subsequent reassembly.
Next, you need to install a working valve, secure it in the housing, connect the wires, pipes, replace the housing cover, that is, do everything that was done during disassembly, but in reverse order. Once assembly is complete, plug the machine’s power cord into a power outlet and start the wash, so you can check the device’s functionality.
Interesting:
Reader comments
- Share your opinion - leave a comment






Add a comment