LG washing machine constantly fills with water
 When using an automatic machine, various types of problems may arise. Due to prolonged use, the main components of the equipment fail, extraneous noise appears during operation, wiring burns out, etc. What to do if the LG washing machine constantly takes in water and immediately discharges it into the sewer? Let's figure out how to deal with a malfunction that threatens not only increased water and electricity consumption, but also the likelihood of flooding the neighbors below.
Manifestation of breakdown
A properly functioning washing machine draws and drains water 2 or 3 times during one operating cycle. This process occurs before and after preliminary and main washing and rinsing. The situation when water constantly flows into the tank of the machine is very difficult not to notice. The user can observe:
- constant noise of water being drawn in and discharged through the drainage system during the washing process;
- increasing the time of a given mode, the cycle is extended due to the washing machine incorrectly executing the running program;
- poor quality of washing - the laundry remains dirty and soapy. This is explained by the fact that the required concentration of the soap solution cannot be achieved.
It is unsafe to operate a washing machine that constantly fills and drains water; the malfunction should be repaired immediately.
Installation errors
What should you do if you find such a problem? The first step is to check whether all the manufacturer’s requirements regarding the installation of washing equipment have been met, namely, connection to the sewerage system. The drain hose should be located at a distance of 50 cm from the floor or more, otherwise the location may lead to spontaneous drainage of water from the tank. The pressure switch, noticing a decrease in the liquid level in the drum, sends a signal to the main board, as a result of which the system adds the required volume of water to the tank and so on in a vicious circle.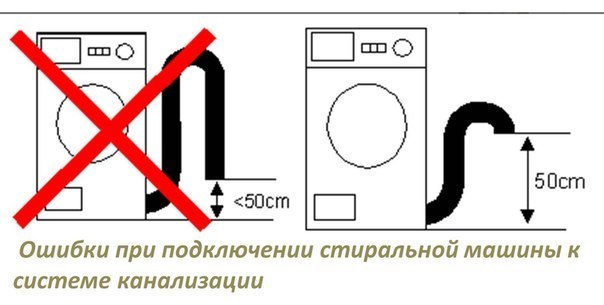
Therefore, first of all, check whether an error was made when connecting the drain hose. The hose should be located above the washing machine tank. If it is not possible to visually assess the location of the drain hose, proceed as follows:
- start any washing program;
- wait until the machine’s tank is completely filled with water;
- enable the “Drain” option;
- press the pause button after the liquid begins to be removed from the tank;
- Continuous drainage of water after stopping the operation of the equipment will indicate obvious problems with the hose connection.
If in pause mode the washing machine actually stops working and stops draining water, then the cause of the malfunction must be looked for in the “insides” of the equipment. We'll tell you what to check next.
Intake valve problems
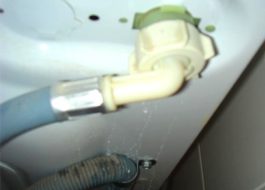
Sometimes LG washing machines do not turn off the water supply due to a failure of the inlet valve. If the element malfunctions, liquid will flow into the tank constantly. So, when the wash starts, the system gives the command to fill the drum with water. A broken inlet valve will not be able to stop the water intake in time, this will lead to activation of the protection: excess water will go into the sewer. The process will repeat in a circle. The user should pay attention to the intensity of the pressure of water entering the tank:
- slow filling indicates membrane deterioration;
- a high rate of water filling indicates failure of the valve itself.
The inlet valve cannot be repaired; a new, serviceable part must be installed in place of the broken one.
The algorithm for dismantling the old one and installing a working inlet valve will be as follows:
- turn off the power to the washing machine;
- remove the top cover of the case (for front-facing models) or the side cover of washing machines with a vertical loading type (since the element is located at the bottom);
- find the inlet valve, disconnect the wires and pipes from it;
- depending on the method of fastening the part, unscrew the bolts or loosen the latches securing the valve;
- carefully remove the element;
- install the working valve in its original place, fix it, connect the wiring and hoses;
- reattach the removed housing wall;
- run the wash in test mode.
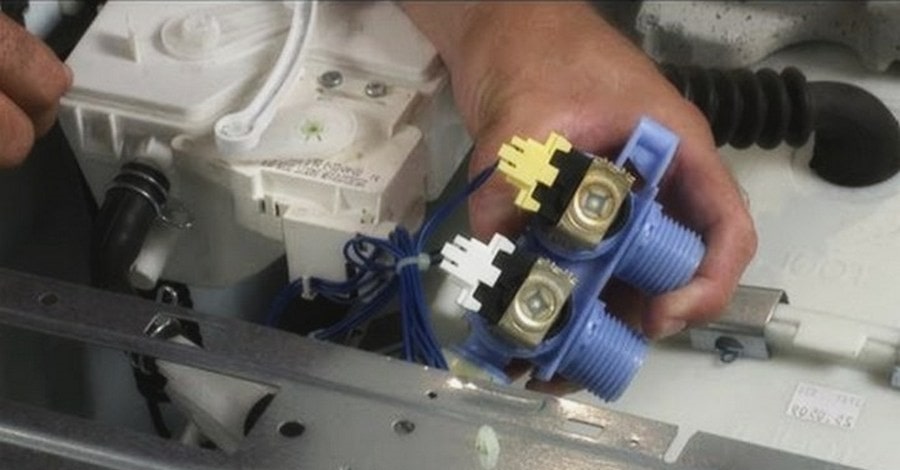
It is important to select a replacement part that is similar to the one removed. Therefore, carefully select the intake valve, focusing on the “home assistant” model.
The water level sensor is broken
If the machine constantly fills with water, the cause may be a faulty pressure switch. The sensor monitors the water level in the tank and sends signals to the main unit about the need to start or stop supplying. When the water level sensor fails, the “brain” of the washing machine receives incorrect information about the volume of liquid in the tank, causing the equipment to malfunction. The pressure switch may stop functioning due to:
- short circuit or oxidation of its contacts;
- clogging of the pressure pipe or the appearance of cracks or kinks on it;
- membrane leakage.
Initially, you should inspect the sensor. If oxidation occurs, you will have to clean the contacts.If a blockage is detected in the pipe, it must be cleaned. You can completely replace the pressure switch with a new one, for this:
- turn off the SMA from the network;
- remove the top cover of the machine;
- disconnect the tube and wiring from the level sensor;
- disconnect the elements securing the part to the body: bolts, screws, terminals;
- dismantle the faulty pressure switch and install a new part in its place;
- secure the sensor with self-tapping screws, connect the terminals and tube;
- Replace the washer lid.
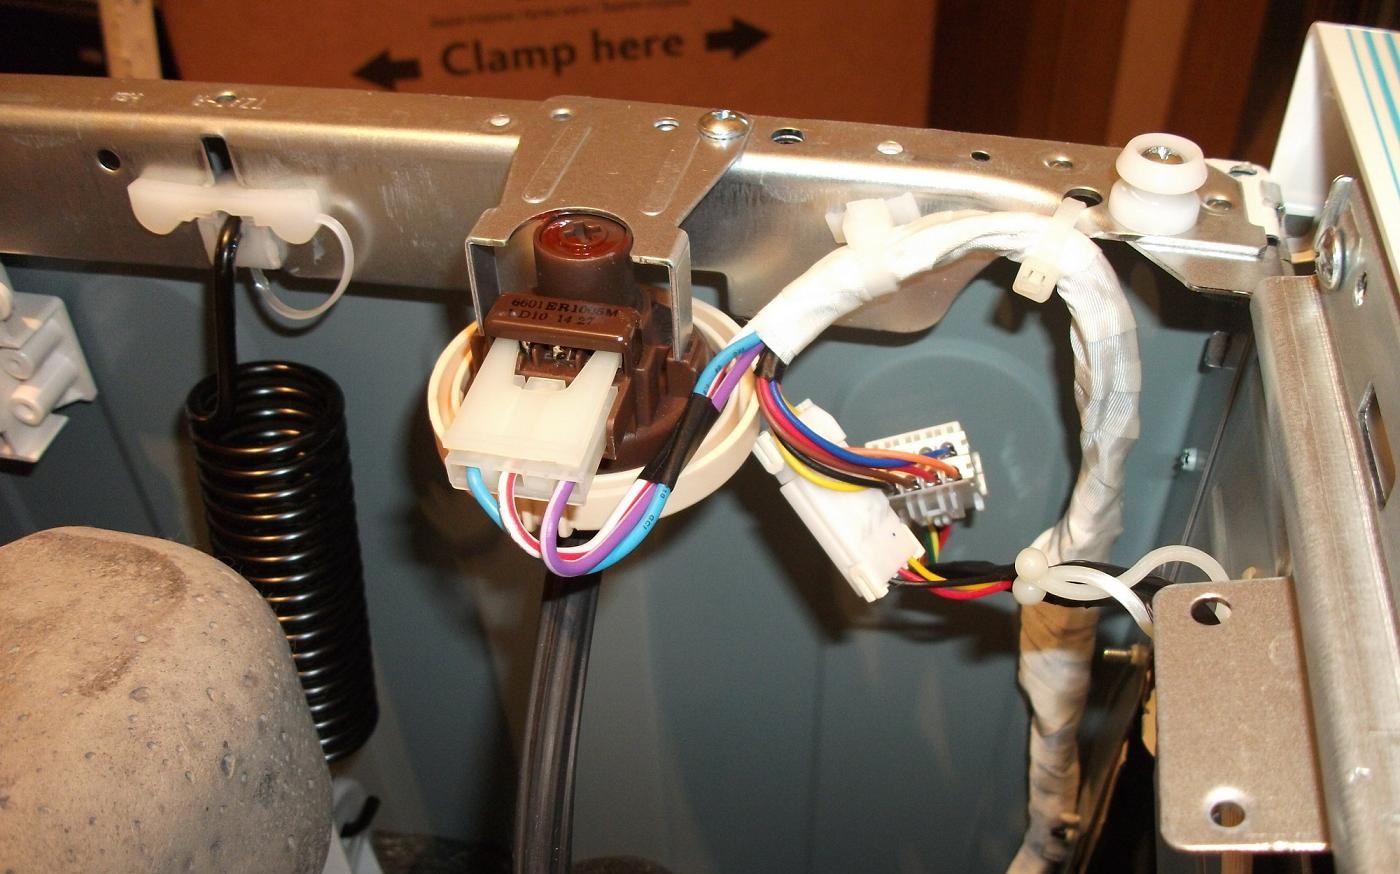
The pressure switch is easy to replace on your own, without the help of a specialist. When buying a replacement water level sensor, choose an element that strictly matches the model of your SMA.
Electronics malfunction
If the washer constantly fills with water even after replacing the valve and pressure switch, then the problem is in the control module.
A malfunction of the main unit leads to the fact that the working sensors of the machine cannot cope with their functions, as they receive incorrect signals from the control board.
The control unit may fail due to:
- voltage drops in the network;
- water ingress;
- mechanical impact;
- end of the standard service life.
In this case, the control board cannot be repaired. It is recommended to invite a specialist and replace the unit with a new one. There is no point in delaying solving the problem; the sooner the problem is fixed, the fewer “sacrifices” you will be able to make.
Interesting:
Reader comments
- Share your opinion - leave a comment




Add a comment