Disassembling the washing machine
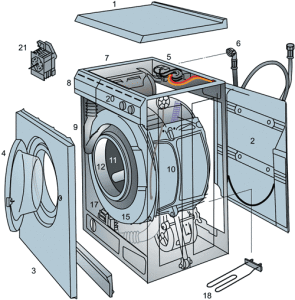 Good day, dear reader. In this article you will find instructions for disassembling the washing machine yourself. Many models of washing machines from different manufacturers have a similar design. And after reading this article, you will learn how to disassemble front-loading machines (Hansa, Indesit, Samsung, LG, Siemens, etc.) with your own hands.
Of course, some models will have their own distinctive features. Some of them will use different fastening elements or the appearance of parts or other little things. But in general, their structure is similar, so using these tips, you can disassemble the washing machine.
Necessary tool
In order to disassemble the washing machine we need a tool. Most of the required tools are found in almost every home. If suddenly a tool is missing, you can buy it in a store or borrow it from a neighbor.
So, we need:
- Phillips and slotted screwdrivers.
- Set of wrenches of various sizes.
- Hammer.
- Plain pliers, bent pliers, pliers, wire cutters, possibly round nose pliers. All these tools must be insulated.
Before starting disassembly, we recommend collecting all the necessary tools. And also make sure that we have disconnected our machine from water and electricity.
If you plan to put the machine back together later, you can photograph particularly complex fastening points, wire connections and other parts. This will help you during assembly.
Removing the front wall of the washing machine
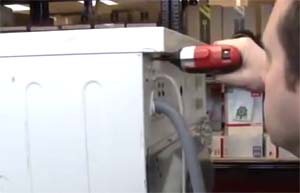 You should start disassembling the machine from the top of the body. That is, from the lid. It is secured with two bolts from the back.To unscrew, use a Phillips screwdriver. After the bolts are unscrewed, we need to push the cover from the front side of the machine towards its rear wall. After which we can remove it.
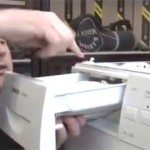 Next, remove the dispenser. In most brands of washing machines, to do this we need to press the point in the middle of the plastic tray and pull it towards us.
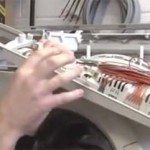 Then we will need to unscrew the screws that secure the control panel.
And carefully separate it and place it on the top of the washing machine so that it does not interfere with us. Some models have a service hook with which we can hang it on the top of the side wall.
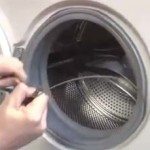 Now let's remove the bottom panel. To do this we need to remove the bolts securing it. Then we move on to removing the rubber cuff of the hatch.
 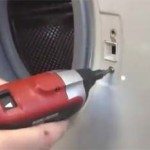 To do this, open the door and remove the fixing clamp. To remove it we will need pliers, a screwdriver or round nose pliers (depending on the type of clamp).
After the clamp is removed, we remove the cuff from the front wall of the machine. Next, we can unscrew the two bolts that secure the hatch lock.
Now all we have to do is remove the remaining fixing elements. 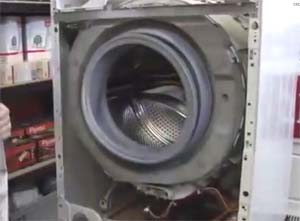 After which we can remove the front wall of the washing machine.
We continue to disassemble the machine
After this, you can remove the inlet hose that goes to the tank. In order to do this, you need to remove the fixing clamp using pliers. Then the hose no longer holds anything and can be removed. Next, remove the hose going to the pressure switch. To do this, we again need to first remove the clamp.
Next, remove the internal clamp that secures the rubber cuff to the tank of the machine. And let's remove this very cuff. Next, remove the back wall of the washing machine. It is secured with screws.We can easily twist them with a screwdriver and remove them.
Next we will remove the counterweights. They can be located both in front of the machine and in the back. In appearance, they look like concrete blocks. They are needed to ensure that the washing machine does not vibrate too much during spinning and other washing modes. They are usually fastened with long bolts. We twist the bolts. We remove the counterweights.
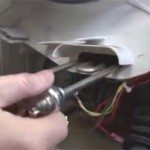 Then we will remove the heating element (heating element). In most machines it is located on the back side at the bottom of the tank. In some models it is located in the front, also at the bottom of the tank. In order to remove it, you need to tighten the fixing nut. It is located in the middle. Then press on the protruding pin. The one you tightened the nut with. It needs to be pushed inside. If this cannot be done by hand, you can gently tap it with a hammer. Next, we pry up the heating element with something flat and carefully remove it.
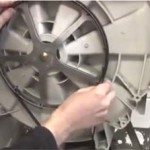 Then remove the drive belt. It goes from the machine engine to a pulley that is mounted on the tank. We will also remove the wires that may be on the tank and motor. We remove the fixing elements of the engine and remove it.
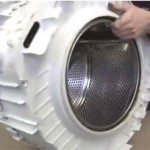 Now our tank is suspended on springs from below and fixed with shock absorbers from below. We twist the shock absorbers and slowly remove the springs. And remove the tank. If you need to disassemble the tank, it is not difficult to do. First, unscrew the bolt that secures the pulley.
 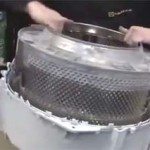 We remove the pulley. We press the shaft inside the tank. Then we divide the tank into two halves; to do this, you need to remove the clamp.
By the way, some models include non-removable – disposable tanks. Some craftsmen saw them using a hand saw. And then assembled using bolts and waterproof sealant.
How to assemble a washing machine?
The machine is assembled in the reverse order.Photos will also help you if you took them during the disassembly process. On them we recommend capturing the location of certain parts, as well as the methods of their fastening and the wires suitable for them. Looking at these pictures, you can easily assemble the washing machine.
Also, for clarity, we suggest you watch the video. In this video, the bearings will be replaced, during which the entire machine will be disassembled. The recording is in English, but even without translation you can disassemble the machine by simply repeating the steps of the master.
How to disassemble a washing machine - video
Read our site and good luck with the disassembly!
Interesting:
6 reader comments



There’s nothing easier to figure out, and even with such tips!
Russians are invincible!!!
Respect to the author for a good presentation of the material
Author, tell me how to unscrew the cross from the drum of a Samsung washing machine? One of the mounting lugs burst and the drum moved forward, cutting the outer tank. Now the crosspiece needs to be replaced. If I lose the page, write me a private message
Not in Russian. But everything is clear from the video. Thank you.
I forgot to lubricate the oil seal, broke off the latches on the tank in vain, and you can knock out the bearings with a rubber hammer for a day. Well done.
What smart people we have in Russia!