Washing machine drum wobbles and wobbles
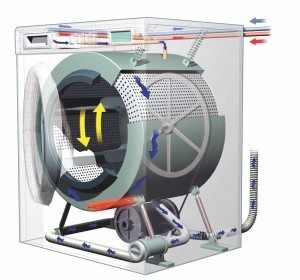 A washing machine drum that is loose and making suspicious sounds should at least alert you, and you should ask yourself why this is happening. This behavior of the most important moving unit can be a precursor to a serious breakdown, so there is no way to leave everything as is and continue to wash it. What kind of washing machine problems does a loose drum cause, how to identify them and how to fix them? We'll talk about all this in this article.
Causes of failure and how to determine them?
Some play in the washing machine drum is provided by the manufacturer., so if you grab its walls and shake it, it will sway a little from side to side - this is normal. In this case, no loud knocking sounds will be heard. It’s another matter if it’s a breakdown; to find out, do the following first.
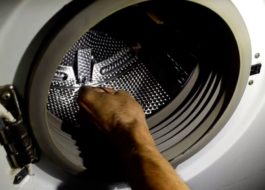
- Open the hatch cover of the washing machine, grasp the drum with your hands and move it from side to side without any extra effort, and then rotate the drum clockwise and counterclockwise. If you hear a fairly loud knock or grinding noise, this is the first sign of a breakdown.
- Turn on the washing machine and set the spin program to the highest possible speed (usually 1000, 1200, 1400 rpm). If, during rapid rotation, the drum dangles a lot, there is a feeling that it has flown off the axis and all this is again accompanied by pronounced loud sounds - this is either a breakdown of the bearing or shock absorber.
- To check for damage, look under the bottom of the washing machine. Typically, bearing problems are accompanied by water leaking through a moving element located on the rear wall of the tank. There is a high probability that a puddle will accumulate under the machine after washing; this will mean only one thing - you need to change the seals and drum bearings.
- If there is a strong knocking sound, but no water is leaking, it is better not to go to the bearings for now, but check the shock absorbers. They are much easier to reach.
Note! When rotating the washing machine drum, pay attention to how easily or hard it turns. If the drum rotates clearly hard, it seems that it has fallen off - this is an indirect sign of bearing failure.
At the initial stage, without disassembling the washing machine, it is impossible to find out anything more. It is impossible to determine exactly what is broken in the washing machine without opening the case, so to clarify the problem, we will remove its top cover and take a look.
Faulty spring suspensions or shock absorbers are usually easy to recognize. It is enough to examine them carefully, or even better, shake them slightly. If at least one faulty spring suspension or shock absorber is found, then consider that the breakdown has been found and there is no need to disassemble the tank to repair the bearings. If the suspensions and shock absorbers are in good working order, then you will have to climb further into the washing machine and remove the tank from it.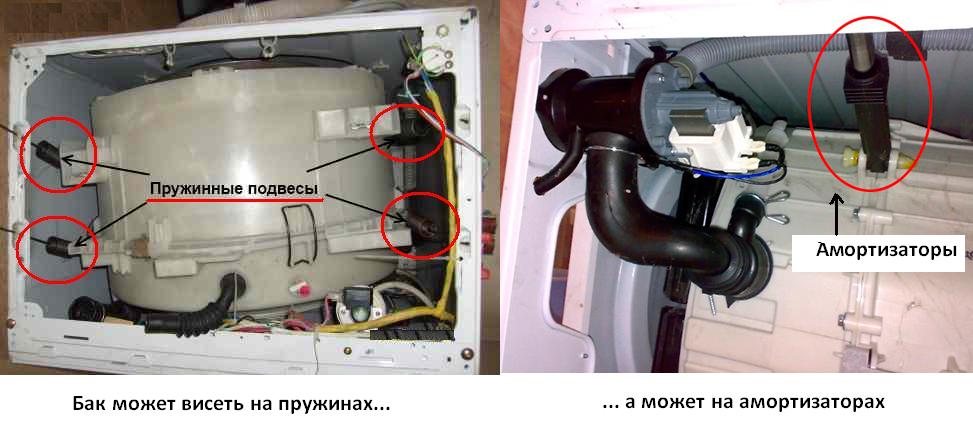
What is required for DIY repairs?
The set of tools and components for repairing a loose drum will depend purely on the nature of the breakdown. If you need to replace shock absorbers or springs, then it is enough to get a flat-head and Phillips screwdriver, an awl, a set of keys and, accordingly, a set of shock absorbers or springs suitable for this model of “washer”.But if you need to change the bearings, then you will need a few more tools and components:
- hammer with copper striker;
- steel rod or pin;
- cold welding or sealant;
- awl, flathead and Phillips screwdrivers;
- set of heads and open-end wrenches;
- pliers;
- specialized lubricant for washing machine mechanisms;
- a set of bearings and seals for a specific model of washing machine.
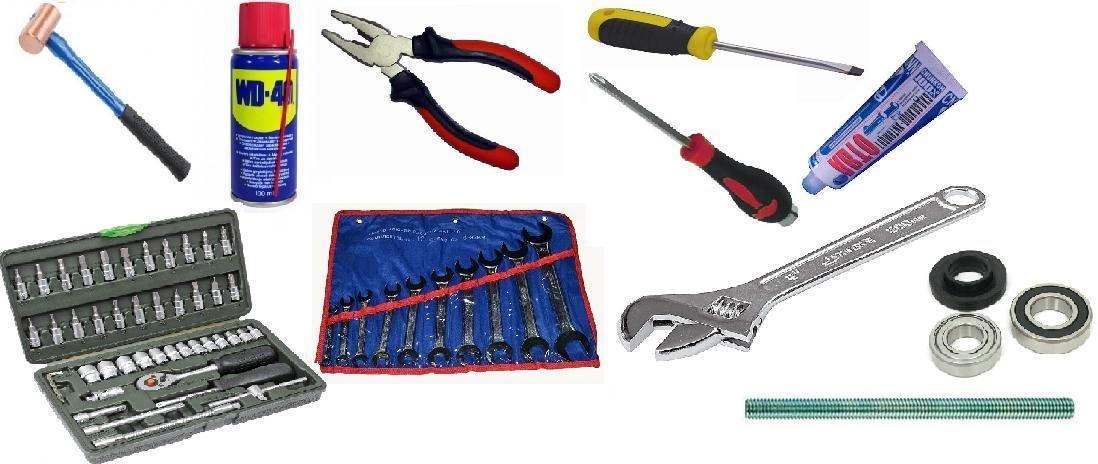 We will need a hammer with a copper striker to more delicately remove the shaft from the washing machine drum pin, since it is precisely such a striker that allows us to avoid damaging delicate parts. A steel rod or pin or other suitable device is needed to knock the bearings out of their seat. In essence, it does not matter what the device will be, the main thing is that it is suitable in length, thickness and consists of metal.
Cold welding or sealant may be required if a certain model of washing machine has a non-separable tank. In this case, in order to disassemble the tank, it is sawed across the seam and then connected using self-tapping screws and cold welding. With the help of an awl it is convenient to pry up the oil seals and pull out the old oil seals, and screwdrivers are useful for unscrewing fasteners, as is a set of sockets and open-end wrenches. Special lubricant will be required to fill the oil seals and lubricate the shock absorbers.
Important! If you decide to change bearings, don’t skimp, change them all as a set. Then you will have less to climb into the body of the washing machine and do it.
We fix breakdowns
Repairing washing machine bearings is a rather complicated procedure.
- First, you need to disassemble it correctly in order to get to the tank and remove it. The problem is that different washing machines from different manufacturers must be disassembled differently - this complicates the matter.
- Secondly, you need to properly disassemble the washing machine tank.
- Thirdly, you need to properly remove the broken bearings without damaging anything. All this creates problems. For more information on how to change bearings in a washing machine using models from LG as an example, read the article about replacing bearings in an LG car?
It is somewhat easier to replace suspensions or shock absorbers, however, there are also pitfalls in this matter. In some models of washing machines, shock absorbers can be reached through the top wall and through the bottom of the case. This is very convenient because it saves a lot of time and effort that is needed to remove the panel, front and rear walls of the washing machine.
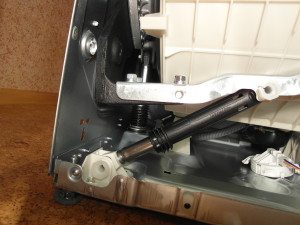 In this case, you will only need to unscrew the fasteners holding the shock absorbers, remove them, and then screw on new ones. If only one shock absorber fails, then everything still needs to be changed - this should always be done. In most models of washing machines, you can get to the shock absorbers only if you remove the front wall. How should you proceed in this case?
- Remove the upper wall of the washing machine body by unscrewing several fasteners and pulling it towards you and then up.
- Remove the powder cuvette and the plate covering the drain filter.
- Unscrew the fixing elements holding the control unit and remove it after unhooking the wires.
- Open the washing machine hatch wide open, then take a screwdriver and remove the hatch locking device by unscrewing the two fasteners and disconnect it from the sensor.
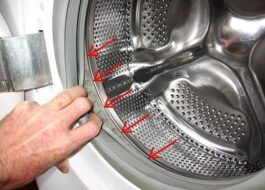
- Take an awl and carefully use it to pick up the clamp, which is located on the rubber cuff.Use your fingers to grab the cuff and carefully pull it out.
- We unscrew the fasteners in the area of the powder cuvette, under the control unit, in the upper and lower right corners of the machine body and remove the front wall. Access to the shock absorbers is open, we change them in the order described above.
We described the process of replacing such parts in the most general form. The whole process is described in more detail in the article, how to change springs and shock absorbers in a washing machine?
To summarize, we note that if the drum of a “washing machine”, which has served faithfully for many years, staggers and knocks, there is a high probability that its shock absorbers or bearings have worn out. What to do? This situation cannot be left to chance., it is urgent to check the drum and repair faulty components. Good luck!
Interesting:
6 reader comments




Useful article. Thank you
Everything is intelligible, understandable!
Thank you very much for your advice. I guess I have this problem. I'll look into it... useful article.
The video is long and boring. Pulls the cat...
Thank you. They calmed me down. It would also be useful to know how much the master will charge.
Can shock absorbers be too “hard”? Quite strange.The engine is normal, the drum does not play, the belt is tensioned normally, but at high speeds and with a load of about 3-4 kg, the machine begins to “beat” somewhere from below. After a year of quite intensive work, the shock absorbers feel tighter than new and are covered with old dust, as if they are not working properly.